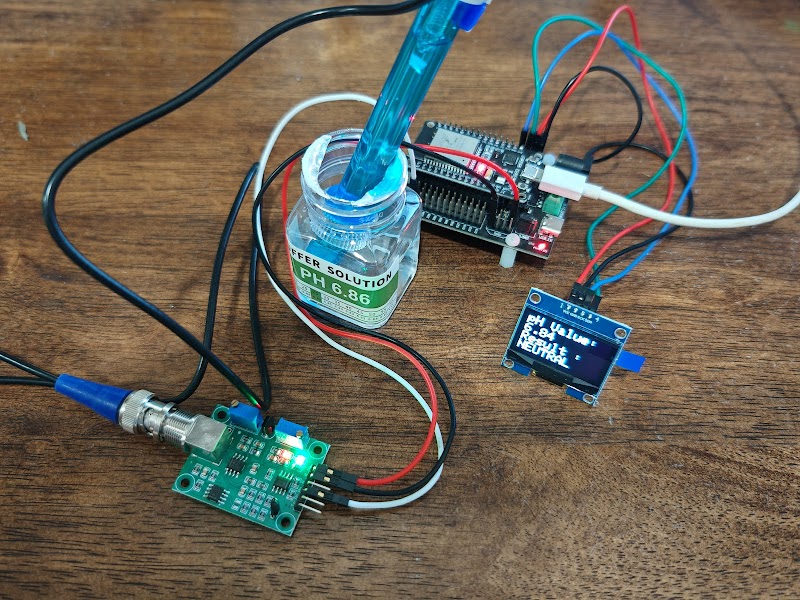
Measuring pH accurately is at the heart of many DIY science and engineering projects — from monitoring a home aquarium to automating a hydroponics system or checking water quality in the field. In this guide, we will walk through everything you need to build a compact, real-time digital pH meter using an ESP32, the E201-C pH electrode, and a 1.3-inch I2C OLED display.
By the end, you will have a working device that reads pH, displays the value live on screen, and even labels the result as Acid, Neutral, or Alkaline — all with a clean three-point calibration you can do at home.
Components for This Project
| Component | Shop |
|---|---|
| ESP32 DEVKIT (WROOM 32) | View Product |
| pH Sensor Module (PH4502C) | View Product |
| 1.3 Inch OLED Display (I2C) | View Product |
What You Will Need
| Component | Notes |
|---|---|
| ESP32 Development Board | Any 30-pin variant works |
| E201-C pH Electrode (BNC) | One of the most common hobby-grade probes |
| pH Sensor Signal Conditioning Board | Converts the electrode voltage to an ADC-readable signal |
| 1.3" OLED Display (I2C, SH1106) | Crisp 128×64 pixels |
| Jumper Wires | Male-to-female for sensor, male-to-male for OLED |
| USB Cable | For power and programming |
| pH 4.00, 6.86 & 9.18 Buffer Solutions | For three-point calibration |
Why the E201-C? It outputs a stable analog voltage that scales linearly with pH, has a BNC connector for a secure noise-free connection, and is widely available. Its glass membrane is durable enough for casual lab and field use.
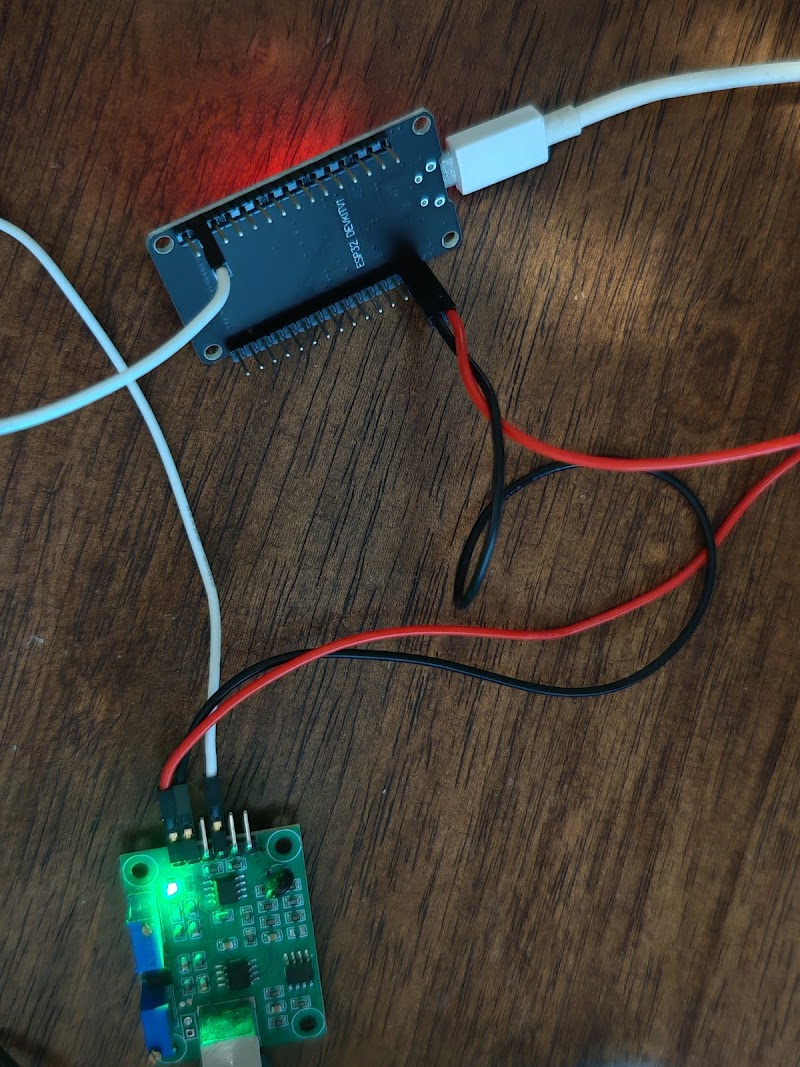
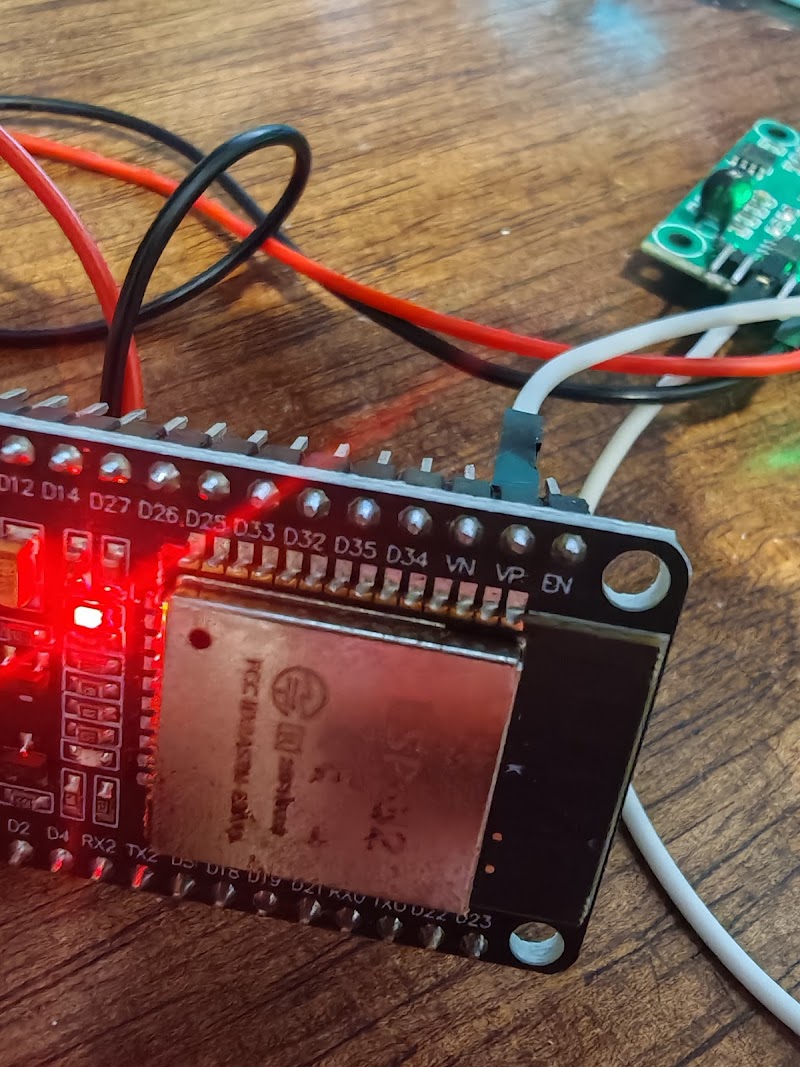
Wiring It Up
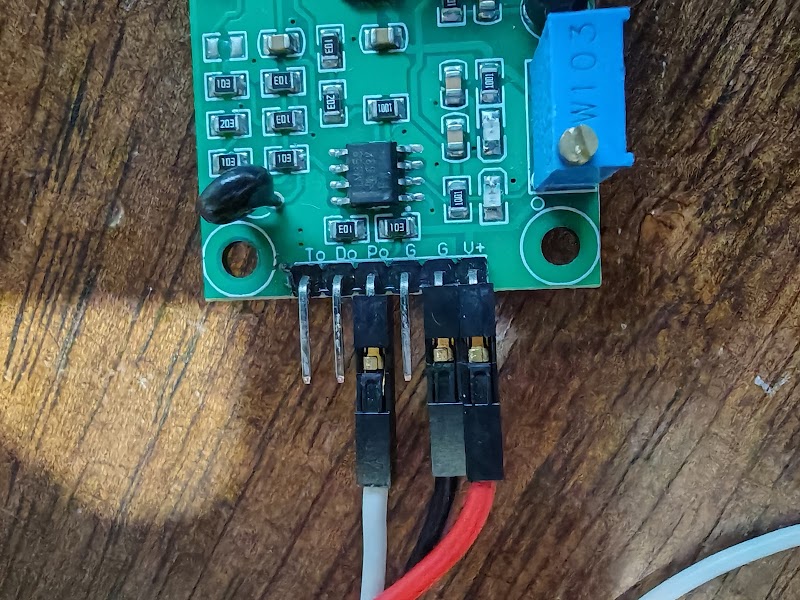
pH Sensor Board → ESP32
| pH Board Pin | ESP32 Pin |
|---|---|
| VCC | 3.3V |
| GND | GND |
| Po (Analog Output) | GPIO 36 (labelled VP on 30-pin boards) |
OLED 1.3" (I2C) → ESP32
| OLED Pin | ESP32 Pin |
|---|---|
| VCC | 3.3V or 5V |
| GND | GND |
| SDA | GPIO 21 |
| SCL | GPIO 22 |
Keep your wires short and tidy — analog signals from pH probes are sensitive to electromagnetic noise. Twist the GND and signal wires together if you can.
Understanding the Code
Before pasting the sketch, let us understand the key ideas:
Three-Point Calibration Constants
The pH sensor board outputs a voltage that the ESP32 converts to a 12-bit ADC value (0–4095). The relationship between ADC reading and pH is linear within each segment, so we calibrate at three known pH points:
cppcode1#define ADC_PH4    1790   // ADC reading when probe is in pH 4.00 solution
2#define ADC_PH686  1280   // ADC reading when probe is in pH 6.86 solution
3#define ADC_PH918  1070   // ADC reading when probe is in pH 9.18 solution
These are example values — yours will differ. The calibration section below shows how to find your own numbers.
Piecewise Linear Interpolation
Instead of using a single slope (which would accumulate error across the full pH range), the code uses two separate linear segments:
- pH 4.00 → 6.86: lower half of the acidic range
- pH 6.86 → 9.18: alkaline half
Readings outside this range are extrapolated using the nearest segment. This approach is far more accurate than a single-slope formula.
Averaging 10 Samples
ADC readings from analog pH probes can be noisy. The loop reads 10 samples with a 10 ms gap between each, averages them, and only then converts to a pH value. This simple technique removes most of the jitter.
Full Arduino Sketch
cppcode1#include <Wire.h>
2#include <Adafruit_GFX.h>
3#include <Adafruit_SH110X.h>
4
5// --- OLED Setup ---
6#define i2c_Address   0x3c
7#define SCREEN_WIDTH  128
8#define SCREEN_HEIGHT 64
9#define OLED_RESET    -1
10Adafruit_SH1106G display(SCREEN_WIDTH, SCREEN_HEIGHT, &Wire, OLED_RESET);
11
12// --- Calibration Constants (update these after calibrating) ---
13#define ADC_PH4    1790
14#define ADC_PH686  1280
15#define ADC_PH918  1070
16
17#define PH4    4.00
18#define PH686  6.86
19#define PH918  9.18
20
21// --- Pin ---
22#define PH_PIN A0   // GPIO 36 / VP on most ESP32 30-pin boards
23
24// --- Helper macro: label the result ---
25#define PH_LABEL(ph) ((ph) <= 6.0 ? "ACID" : ((ph) <= 8.0 ? "NEUTRAL" : "ALKALINE"))
26
27// Convert raw ADC reading to pH using piecewise linear interpolation
28float adc_to_ph(int adc) {
29  if (adc <= ADC_PH4 && adc >= ADC_PH686) {
30    return PH4 + (float)(adc - ADC_PH4) * (PH686 - PH4) / (ADC_PH686 - ADC_PH4);
31  } else if (adc < ADC_PH686 && adc >= ADC_PH918) {
32    return PH686 + (float)(adc - ADC_PH686) * (PH918 - PH686) / (ADC_PH918 - ADC_PH686);
33  } else if (adc < ADC_PH918) {
34    // Extrapolate above pH 9.18
35    return PH918 + (float)(adc - ADC_PH918) * (PH918 - PH686) / (ADC_PH918 - ADC_PH686);
36  } else {
37    // Extrapolate below pH 4.00
38    return PH4 + (float)(adc - ADC_PH4) * (PH686 - PH4) / (ADC_PH686 - ADC_PH4);
39  }
40}
41
42void showOnOLED(float ph) {
43  display.clearDisplay();
44  display.setTextColor(SH110X_WHITE);
45
46  display.setTextSize(1);
47  display.setCursor(0, 0);
48  display.println("-- pH Meter --");
49
50  display.setTextSize(3);
51  display.setCursor(0, 16);
52  display.println(ph, 2);   // two decimal places
53
54  display.setTextSize(2);
55  display.setCursor(0, 46);
56  display.println(PH_LABEL(ph));
57
58  display.display();
59}
60
61void setup() {
62  Serial.begin(115200);
63  Wire.begin();
64  delay(250);
65  display.begin(i2c_Address, true);
66  display.clearDisplay();
67  display.display();
68  pinMode(PH_PIN, INPUT);
69  Serial.println("pH Meter ready.");
70}
71
72void loop() {
73  // Average 10 samples to reduce ADC noise
74  float phSum = 0;
75  for (int i = 0; i < 10; i++) {
76    int raw = analogRead(PH_PIN);
77    phSum += adc_to_ph(raw);
78    delay(10);
79  }
80  float ph = phSum / 10.0;
81
82  Serial.printf("pH: %.2f  [%s]\n", ph, PH_LABEL(ph));
83  showOnOLED(ph);
84}
Three-Point Calibration — Step by Step
Calibration is what separates a useful pH meter from a random number generator. Take 15 minutes to do this properly and your readings will be reliable.
What you need
- Three buffer solutions: pH 4.00, pH 6.86, and pH 9.18
- A small flathead screwdriver (to turn the trimpot on the sensor board)
- Arduino IDE Serial Monitor open at 115200 baud
Steps
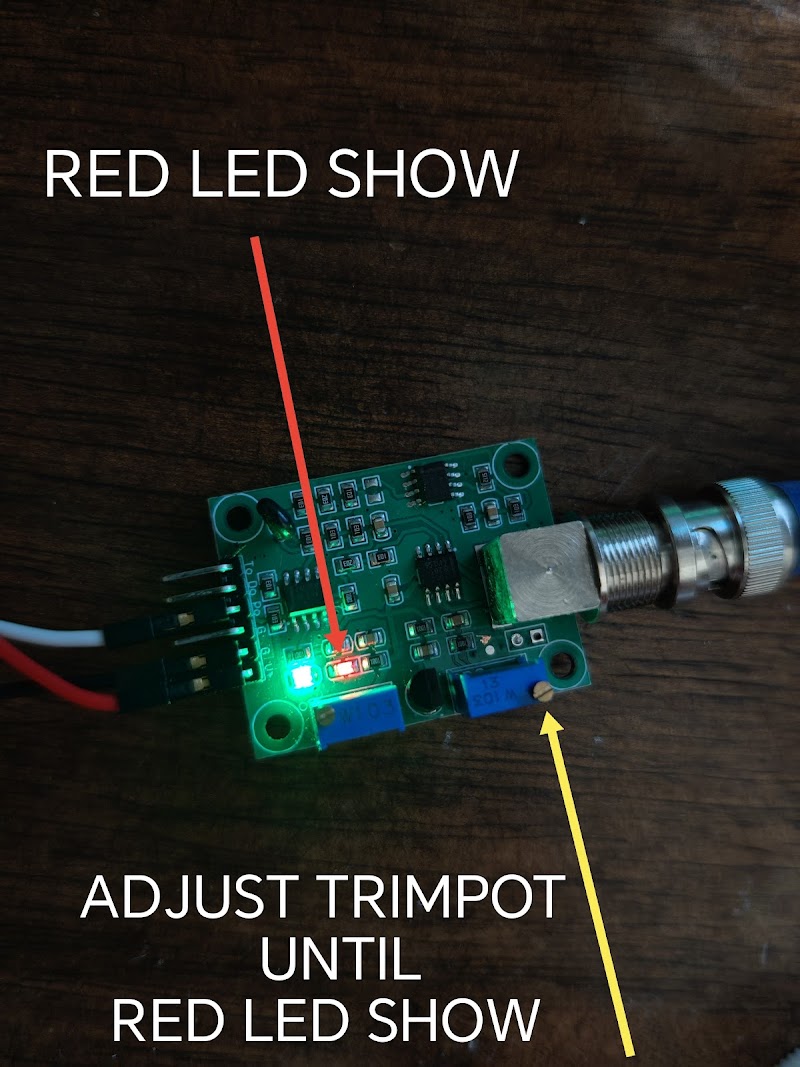
1. Start with pH 6.86 (the zero point)
Rinse the probe with distilled water, then submerge it in your pH 6.86 buffer solution. Wait 30–60 seconds for the reading to stabilise. Slowly turn the trimpot on the sensor board until the red LED just lights up — this sets the neutral reference point. Do not over-turn; stop the moment the LED turns on.
2. Record the ADC value for pH 6.86
Open Serial Monitor. Note the ADC value being printed. Update your sketch:
cppcode1#define ADC_PH686 <your reading here>
3. Move to pH 9.18
Rinse the probe, move to the alkaline buffer. Wait for stability. Note the new ADC value:
cppcode1#define ADC_PH918 <your reading here>
4. Move to pH 4.00
Rinse again, move to the acid buffer. Note the ADC value:
cppcode1#define ADC_PH4 <your reading here>
5. Upload and verify
Upload the updated sketch. Check each buffer again — the displayed pH should be within ±0.1 of the labelled value.
Pro tip: Always calibrate in order from Alkaline → Neutral → Acid. Moving from a more alkaline to a more acidic solution reduces contamination and extends the life of the glass membrane.
Troubleshooting
| Symptom | Likely Cause | Fix |
|---|---|---|
| pH reads 0 or 14 constantly | Probe not connected or broken | Check BNC connection |
| Reading jumps wildly | Electrical noise | Shorten wires; twist signal + GND |
| OLED stays blank | Wrong I2C address | Try textcode textcode |
| Value drifts slowly | Probe not warmed up | Leave probe in water for 2 min before reading |
| Very far off from expected | Not calibrated | Redo calibration steps |
Taking It Further
Once you have a working pH meter, there are many ways to expand the project:
- Log data to an SD card — add a micro-SD module and record pH, timestamp, and temperature at regular intervals
- Wi-Fi alerts — use the ESP32's built-in Wi-Fi to push a notification when pH drifts outside a safe range
- Temperature compensation — pH readings shift with temperature; add a DS18B20 probe and apply the Nernst equation for more accurate results
- Hydroponics automation — trigger a dosing pump to add pH-up or pH-down solution automatically
Wrapping Up
Building a digital pH meter with an ESP32 and OLED is a fantastic hands-on project that teaches you about analog signal conditioning, multi-point calibration, and clean embedded UI design — all in one build. The E201-C probe is a solid choice for beginners and the SH1106 OLED gives you a crisp, readable display with minimal wiring.
If you are sourcing components, check out the pH sensor modules, ESP32 boards, and OLED displays available in our store — everything you need ships together.
Happy building! 🔬